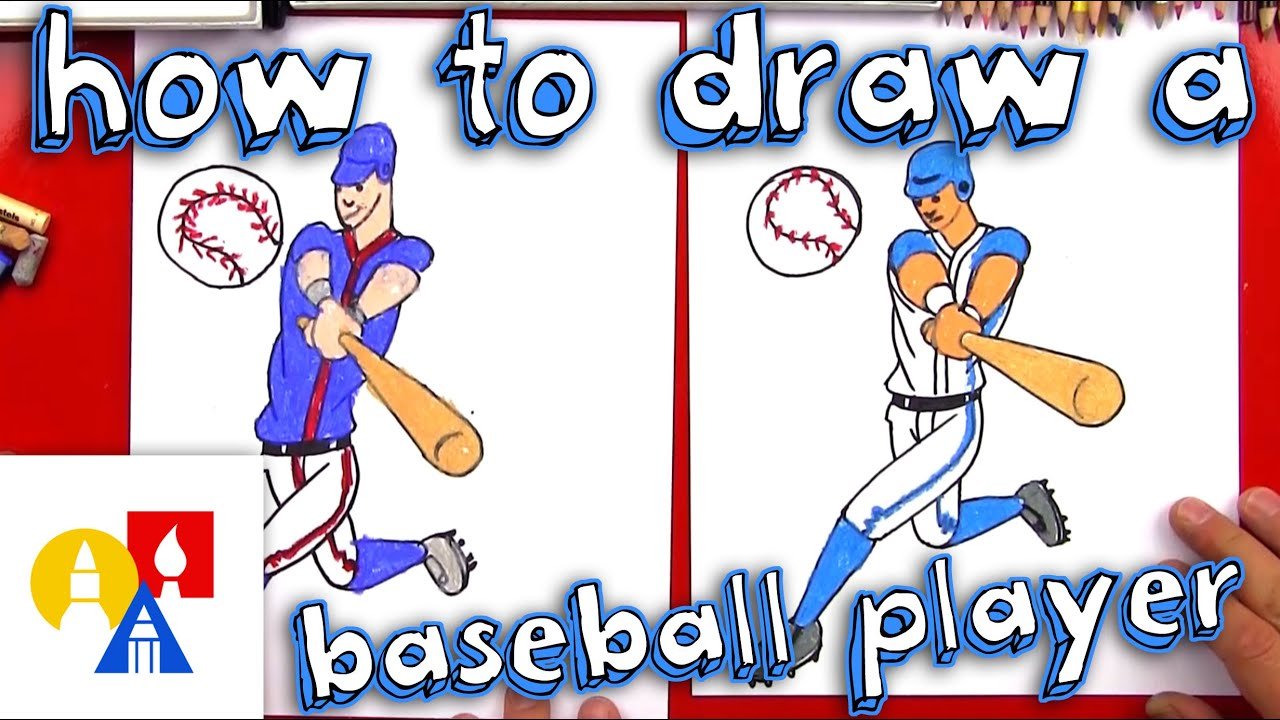
Drawing a baseball player can be a fun and rewarding experience. This guide will help you create a dynamic and accurate sketch.
Baseball is a sport that captures action and excitement. Drawing a player in motion can bring that thrill to life on paper. Whether you are a beginner or an experienced artist, this tutorial will simplify the process. You will learn to break down complex forms into easy shapes.
With a few simple steps, you can draw a lifelike baseball player. All you need are basic drawing tools and a bit of patience. Let’s get started and bring the energy of baseball onto your canvas.
Materials Needed
Creating a detailed drawing of a baseball player requires the right materials. Having the right tools and paper can make a big difference. In this section, we’ll cover everything you need to get started.
Drawing Tools
First, gather your drawing tools. You will need pencils of various hardness. Use an HB pencil for basic outlines. Use 2B and 4B pencils for shading. Erasers are also essential. A kneaded eraser works well for lightening areas. A vinyl eraser is good for clean lines. You might also need a pencil sharpener to keep your pencils sharp. Consider using fine-tipped pens for final outlines.
Paper Selection
Next, choose the right paper. Use a sketchbook or loose sheets. Look for acid-free paper to prevent yellowing. Choose paper with a bit of texture. This helps with shading. A medium weight paper, around 70-80 lb, works best. Heavier paper can handle more erasing and layering. Avoid glossy paper as it can be too smooth.
Basic Shapes
Learning how to draw a baseball player begins with understanding basic shapes. These shapes form the foundation for more complex details. Starting with simple shapes makes the process manageable. It also ensures your drawing stays proportional.
Sketching Circles
Circles are fundamental in drawing. Use them to represent the head and joints. Begin with a circle for the head. Place it at the top of your paper. This will help you keep the proportions correct. Next, sketch small circles for the shoulders, elbows, and knees. These circles guide the placement of limbs. They help maintain balance in your drawing. Don’t worry about perfection. These are just guidelines.
Drawing Ovals
Ovals add depth and shape to your drawing. Use them for the torso and limbs. Start with an oval for the torso. Position it below the head circle. This will give your drawing a realistic body shape. Draw smaller ovals for the arms and legs. Connect these to the circles you sketched earlier. Ovals provide a sense of volume. They help you visualize the 3D form of the body. Again, these are just guidelines. You will refine them later.
Outlining The Body
Drawing a baseball player begins with outlining the body. This part is crucial for setting the right proportions and posture. Focus on the torso and limbs to create a balanced and dynamic pose. Let’s break it down into two main steps: the torso structure and the limbs positioning.
Torso Structure
Start by sketching the torso. It forms the core of the body. Use simple shapes to capture the basic structure. A rectangle or an oval works well for this purpose. Make sure the torso is slightly tilted to show movement. Baseball players are rarely standing still.
Next, add the guidelines for the shoulders and hips. These lines should be parallel. They help in aligning the rest of the body. Remember to keep the shoulders broader than the hips. This gives the player a more athletic look.
Limbs Positioning
Positioning the limbs correctly is essential. Start with the arms. Draw two lines extending from the shoulders. These lines represent the upper arms. Add circles at the ends for the elbows. Continue the lines to draw the forearms.
For the legs, begin at the hips. Sketch lines for the thighs. Add circles for the knees. Complete the legs by extending lines for the lower legs. Make sure one leg is slightly bent. This gives the impression of movement.
Finally, add simple shapes for the hands and feet. Rectangles or ovals work well here. Ensure the hands are gripping a bat or a glove. This completes the dynamic pose of a baseball player.

Credit: creativityschool.com
Adding Details
Adding details to your drawing brings it to life. It makes your baseball player look realistic. This step involves refining facial features and clothing elements. These elements are crucial to capturing the essence of a baseball player.
Facial Features
Start with the eyes. Draw them as simple ovals. Add small circles inside for pupils. This gives the eyes depth. Next, add eyebrows. They should match the character’s expression. Happy or focused, eyebrows set the tone.
Draw the nose with a small, curved line. Keep it simple. For the mouth, use a thin line. A slight curve can show a smile or determination. Don’t forget the ears. Small, rounded shapes on each side of the head work well.
Finally, add hair. Short or long, it should fit under a baseball cap. Use quick, short strokes for texture. Remember, facial features bring personality to your player.
Clothing Elements
Baseball uniforms are unique. Start with the jersey. Draw a V-neck or button-up shirt. Add details like seams and wrinkles. These small touches add realism. Don’t forget the team logo or number.
Next, draw the pants. They should be loose but fitting at the waist and ankles. Add lines for folds and creases. This gives the pants a realistic look. Include a belt with a small buckle.
Now, add the gloves and cleats. Draw the gloves as oversized mitts. Add stitching lines for detail. For the cleats, use small spikes on the soles. These details complete the uniform.
Remember, clothing elements are key. They make your baseball player look game-ready.
Drawing The Cap
Drawing a baseball player’s cap can be a fun and rewarding experience. The cap adds personality and character to your drawing. Let’s break it down into simple steps to make it easier.
Cap Shape
Start by drawing an oval shape for the top part of the cap. This oval will represent the crown of the cap. Ensure the oval is slightly tilted to match the angle of the player’s head.
Next, draw the brim of the cap. Begin by drawing a curved line from one side of the oval to the other. This line will form the base of the brim. Add another curved line parallel to the first to complete the brim.
Connect the brim to the crown with two short lines on each side. This will give the cap a 3D appearance. Erase any unnecessary lines within the cap to clean it up.
Adding Logo
Adding a logo to the cap is a great way to make your drawing unique. Start by choosing a simple logo design. This could be a letter, a shape, or a small emblem.
Lightly sketch the logo on the front of the cap. Ensure the logo is centered and proportionate to the size of the cap. You can use a ruler to help with alignment if needed.
Once you are happy with the placement, darken the logo outline. Add any details such as lines or shading to make the logo stand out. This will give your baseball player’s cap a finished look.
Creating Motion
Learn to draw a baseball player capturing the motion of the game. Start with basic shapes, then add details like uniform and bat. Enhance your drawing by focusing on body posture and movement.
Creating motion in your drawings can bring your baseball player to life. Capturing the energy and movement makes the drawing more engaging. By focusing on action poses and dynamic lines, you can create a sense of motion.
Action Poses
Start with the basic pose of your baseball player. Imagine them in the middle of an action. Think of a batter swinging, a pitcher throwing, or a fielder diving. These poses show the player in motion. Use reference images if needed. Sketch the overall shape of the body. Keep the limbs slightly bent. This shows they are in the middle of an action. Avoid stiff, straight lines. Add details like the bend of the knees or the twist of the torso. This helps to create a natural, flowing pose.
Dynamic Lines
Dynamic lines add energy to your drawing. They make the action more believable. Use curved lines to show movement. For example, a swinging bat or a ball in flight. Avoid using too many straight lines. Curved lines give a sense of speed and direction. Draw lines that lead the viewer’s eye through the action. This technique is known as “leading lines.” For example, the line of the arm can lead to the bat. The bat’s line can lead to the ball. This creates a visual path for the eye to follow. By focusing on these elements, your baseball player will appear to be in motion. Each action pose and dynamic line adds life to your drawing.
Shading Techniques
Shading can bring your drawing to life. It adds depth and realism. When drawing a baseball player, proper shading can make the image pop. In this section, we’ll discuss some essential shading techniques.
Light Source
Understanding the light source is crucial. It dictates where shadows fall. Always decide the light’s direction before you start shading. This helps in creating a consistent look.
If the light comes from the left, the right side of the player will be darker. This rule applies to all parts of the drawing. The cap, jersey, and even the bat.
| Light Source Direction | Shading Placement |
|---|---|
| From the left | Shadows on the right |
| From the right | Shadows on the left |
| From above | Shadows below |
Shadow Placement
Correct shadow placement enhances realism. Identify the parts of the player that block the light. These areas will have shadows.
- Under the cap: The player’s face will have a shadow under the cap.
- Under the arms: Shadows will appear under the arms, especially if they are raised.
- Behind the bat: If the player holds a bat, the bat will cast a shadow on the body.
Use light strokes to build up shadows. This prevents the drawing from looking too harsh. Blend the edges of the shadows for a smooth transition.
Remember, practice makes perfect. Keep experimenting with different shading techniques.
Final Touches
Now that you’ve sketched your baseball player, it’s time to add the final touches. These steps will make your drawing look polished and professional. Focus on refining lines and adding highlights to bring your player to life.
Refining Lines
Start by going over the main lines with a darker pencil or pen. This will help define the structure of your baseball player. Pay special attention to the edges of the uniform, the curves of the muscles, and the details of the face.
- Use a fine-tipped pen for precise lines.
- Erase any unnecessary sketch lines.
- Ensure the lines are smooth and clean.
Take your time with this step. A steady hand will ensure your lines are crisp and clear. This will make your drawing more vibrant and detailed.
Adding Highlights
Highlights add depth and dimension to your drawing. Use a white pencil or eraser to create light spots on the uniform, helmet, and other areas where light naturally hits.
- Add highlights on the helmet for a shiny effect.
- Highlight the folds in the uniform.
- Don’t forget the eyes and teeth for a realistic touch.
These highlights will make your baseball player look more three-dimensional. They will also create a more dynamic and engaging image.
| Step | Action |
|---|---|
| Refining Lines | Go over the sketch with a darker pencil or pen. |
| Adding Highlights | Use a white pencil or eraser for light spots. |

Credit: easydrawingguides.com
Frequently Asked Questions
How Do I Start Drawing A Baseball Player?
Begin by sketching basic shapes for the head, torso, and limbs. Add details gradually.
What Tools Do I Need To Draw A Baseball Player?
Use pencils, erasers, paper, and optionally, colored pencils or markers for detailing.
How To Draw A Baseball Player’s Uniform?
Start by drawing the basic shape. Add details like buttons, stripes, and team logos.
How Can I Draw Realistic Baseball Player Poses?
Study photographs of players in action. Practice sketching their dynamic movements and stances.
Conclusion
Drawing a baseball player can be fun and easy. Start with basic shapes. Add details like the uniform and equipment. Focus on the player’s posture and action. Practice makes perfect. Follow these steps and keep improving. Soon, you’ll have a great drawing.
Enjoy the process and be patient. Your baseball player drawing will look amazing with time. Happy drawing!